Saturday 8 March 2014

DVD Menu's

Shrek DVD Menu


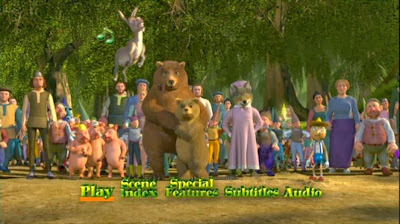
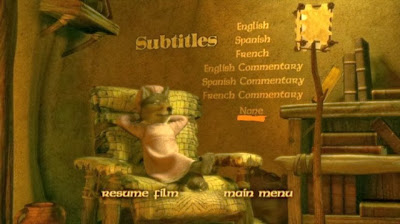
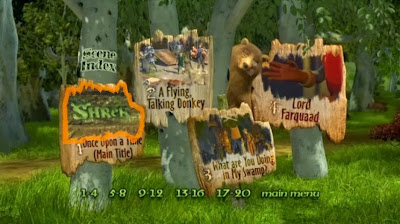
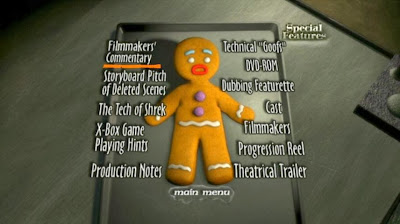
Shrek DVD menu was created in 2001. Shrek DVD menu is very interactive, it has a lot of animations,sound and movement. It uses it's animated characters to make the menu more interesting and fun, when you click each option in menu different character runs towards you then appears in the next screen/the option we chose, this transition looks like one of the characters ran from one screen into another, in my opinion it's a great way to make the menu interesting and memorable. If you choose 'Scene index' little bear will run towards you and then selection of different scenes will appear, each scene selection is a little screen in wooden stand, all little screens are moving which i think is great as it gives people more clue and idea visually on which scenes they want to choose. There's a lot of movement going on in scene index option as like i said there are small screens with scenes playing and there's also a bear jumping around and hiding behind the screens. Next option in the main menu is Special Features,  this time it's Pinnochio running towards you, it's a transition to Special Features where cookie is, every option in the sub menu for special features is highlighted with an orange/yellow line. Another selection in main menu is Subtitles, you see another character running , then it transits to sub menu where you can choose different languages, each option is highlighted with orange/yellow line, last thing in main menu is Audio, of course another character running/flying towards you,in audio you can choose Filmmakers Commentary,English 5.1 Dolby Digital,English 2.0 Dolby Surround,French 2.0 Dolby surround and Spanish 2.0 Dolby surround. Shrek DVD menu has great, bright colours, children and even teenagers surely like it as it's interactive.  People that designed Shrek DVD menu introduced easter-eggs which include game add-ons and internet links to Shrek movie website.Shrek menu's include a lot of different music and characters talking. Whenever you chose a different option the music changed.Shrek languages menu has 3 different languages with 3 different commentary options with different languages.

Matrix DVD Menu


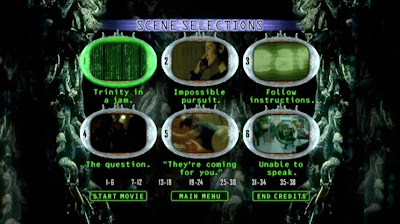
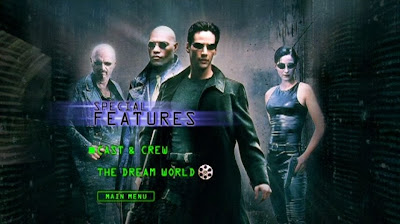
The Matrix DVD Menu is quite basic compared to Shrek's menu. It starts of with a slow motion movie scene then jumps to a lot of scenes , and then one of the characters says 'welcome to the real world'after that the actual main menu is starting to appear on the screen, and the music is playing in the background also we see some movie scenes in the background of main menu.  I think that the music is very effective and dramatic, i also think it's exciting and it makes people watch it although i don't think that the menu it's self is great, scenes playing in the background are slightly annoying and not very effective. Main menu includes the following options; scene selections,special features, languages and play movie of course. If you want to select one of the options each option will be highlighted with a small green square on the right side of text.Matrix Menu is very basic like i've mentioned before, it's language menu only includes English language and English Subtitles, shrek has 3 languages and 3 different language commentary options.Matrix menu is very different too shrek's menu as the music in matrix menu is the same, it doesn't change where as in shrek it changes each time you clicked on different option, also another thing is moving scenes in scene index/scene selections, in matrix they used still images of scenes where as in shrek they used short clips of scenes.Matrix advertised
their movie by having small special features menu with a cast and crew list and a trailer for their movie where as shrek was advertised by easter eggs as they had links to their web sites etc.


Gothika DVD Menu

Gothika menu was created in 2003. In my opinion it's quite basic but effective. It has quite dull and cold 
colours but it's a thriller/horror therefore i think it's great. On the left side of the screen we can see different pictures, they change slowly, they kind of fade in and fade out one after another and i think it's great as it adds a bit of that creepiness into the menu. When you want to click on one of the options in the main menu every option highlights with a yellow line. Gothika menu has a very effective music/soundtrack in the background, it's creepy and interesting. Gothika's main menu includes the following options; play movie,audio set up,scene selections,special features and trailers. There's only two languages to choose and they are; English and French, although there is a selection of subtitles of English,french and Spanish. Special features include; commentary,behind blue eyes music video by Limp Bizkit , and Theatrical Trailer,all this time the background is still the same it just has different pictures fading in and out on different side of the screen. They advertise their movie by adding trailers, and links to their website.I think it's very different to both Shrek and Matrix, as this is even more basic than Matrix, it doesn't have scenes or movie clips playing in the background, it has different pictures fading in and out, and one soundtrack playing in the background, shrek has a lot of music and a lot of characters moving its also very happy and has bright colours, gothika mostly uses blue/black and white colours which are cold and dull. In my opinion Gothika's menu is the most effective and most interesting menu out of them three, i think it's basic and nothing distracts people for example characters running around or different music, or clips playing in the background. I think it's nice and simple as it is, people want to watch films, and basic but interesting menu is good enough.


ITV report

ITV Report

On the 11th of February a guy from ITV visited us. He came to college to make a report on our DVD being made, although they were only interested in the Royal Visit part. He decided to shoot people that were shooting the Royal Visit at Thronham Village Hall.


Our job roles/Thornham DVD

Job Roles


When we started out DVD Authoring project we all divided ourselves into different job roles, we all had to focus on our chosen task. 

Notes;


Like I've said before we all devided ourselves into different positions/job roles, we all worked in pair or groups of 3.
I was in a pair with Danny our job role was Bonus. We had to create menu's for our thornham dvd.
Kristan's job was to edit interviews.
Luke and Roger edited footage of new hall.
 Ilze,Kim and Heather did Gallery.
David was a producer
Ellen and James did subtitles.
Beth and Suskia did scene selection.
Josh and Kieran did graphics.
Sean,Harry and Jonny were the main people.

Research/Copyright

Copyright

When a person or company creates material – be it a work of literature, art, music, film or broadcast – copyright gives that person the right to control the use of their material. Copyright is designed to protect the creator of the content, and is designed to inform who can copy, adapt or distribute that work without permission and when this is allowed.
Copyright laws protect those who work in the creative industries, allowing them to be rewarded fairly and to continue to create music, film and TV programmes.
File:DVD-R bottom-side.jpg


Sunday 23 February 2014

Research/DVD sizes

DVD sizes


There are five DVD sizes:

-DVD 5
-DVD 10
-DVD 9

-DVD 14
-DVD 18
-Double layers DVDs


Double Layer (Dual Layer) and Double Sided DVDs hold more than the standard 4.7GB of a   single sided single layer DVD.A lot of new DVD Burners for computers burn Double-Sided and Double (Dual) Layer DVDs. 

DVD-5 holds 4.7GB and is also supported by the DVD+R/RW and DVD-R/RW formats. It's also known as Single Sided single layer. 

DVD-10 holds 8.75GB and is supported by the DVD+R/RW and DVD-R/RW formats. It's known as Double Sided single layer. 

DVD-9 holds 8.5GB and is supported by the DVD+R and DVD-R formats. It's known as Single Sided double layer (also called Dual Layer). The following are the official names for them : DVD-R DL and DVD+R DL.

DVD-14: double sided, double layer on one side, single layer on other, 13.3 GB (12.3 GiB)

DVD-18 holds 15.9GB and is supported by the DVD+R format,known as Double Sided double layer.

Saturday 22 February 2014

Research/DVD Region Codes

DVD Region codes

Our world is segregated into regions, and DVD's are usually encoded for play back in only one region, this is because the movies are released on different dates in different regions,DVD Region codes for movies have been created to control the exportation of movies to different countries.

For example: Region 4 DVDs WON'T PLAY in a standard Region 1 DVD player; Region 1 DVDs WON'T PLAY in a standard Region 4 DVD player.d

DVD Regions and their corresponding countries:
R1 Region 1 - U.S.A., U.S. Territories and Canada

R2 Region 2 - Europe, Japan, the Middle East, Egypt, South

Africa, Greenland

R3 Region 3 - Taiwan, Korea, the Philippines, Indonesia, Hong Kong

R4 Region 4 - Mexico, South and Central America, Australia, New Zealand, Pacific Islands, Caribbean

R5 Region 5 - Russia, Eastern Europe, India, Africa (excluding South Africa), North Korea, Mongolia

R6 Region 6 - China


Thursday 30 January 2014

www.cwadvd.blogspot.co.uk

Using DVD Studio Pro

In this post I am going to show and explain how to:

 *Create DVD menu and assets


Step 1
First of all we had to open the Compressor like we did last time. We opened Final Cut Pro, we clicked on 'File' then 'Send to' then 'Compressor'. We then had to find a file called DVD:Best Quality 90 minutes,after we clicked on it we could see two files 'Dolby Digital Professional 2.0' and 'MPEG-2 6.2Mbps 2-pass'. Just like last time we had to select these two folders and drag them up and drop them in Sequence 1.

Step 2
After we dropped two files in the Sequence 1 we had to Right Click on the file called 'MPEG-2 6.2Mbps 2-pass'(the one placed in Sequence 1).  After we right clicked on the following file we then had to select 'Destination' which let us choose where we wanted to send/save the file.  I chose to save the file on 'Desktop'.

Step 3
Next step was to go to Inspector which is placed on the right hand side under Sequence 1 and change some settings. What we had to do was have a look at Geometry and make sure that everything was correct. So like I said, go to Geometry then make sure that setting 'Crop to' is Crop to:Custom, then change Left, Right, Top and Bottom to 2.

Step 4
 We then had to save the file again, so we right clicked on the file placed in Sequence 1, then chose 'Destination' then 'Desktop' .

Step 5
 We then had to submit the file, so we had to click on 'Submit' which was placed above the inspector and underneath Sequence 1.I called the file 'suskia ellen angelika' , then made sure that the 'Cluster' was set to 'Cluster:This computer' and that the 'Priority' was set to 'Priority:High'.
Next step was to click Submit and wait until it Submits Successfully.

Step 6
If the file submits successfully we'll be able to see something appear in 'History' which is placed on the right hand side of the 'Inspector'. In my case the file submitted successfully as we can see the file called 'suskia ellen angelika' where it says 'History' 'Today' . It shows the date of submission and that it was successful.

Step 7
Next step was to Open DVD Studio Pro.

Step 8
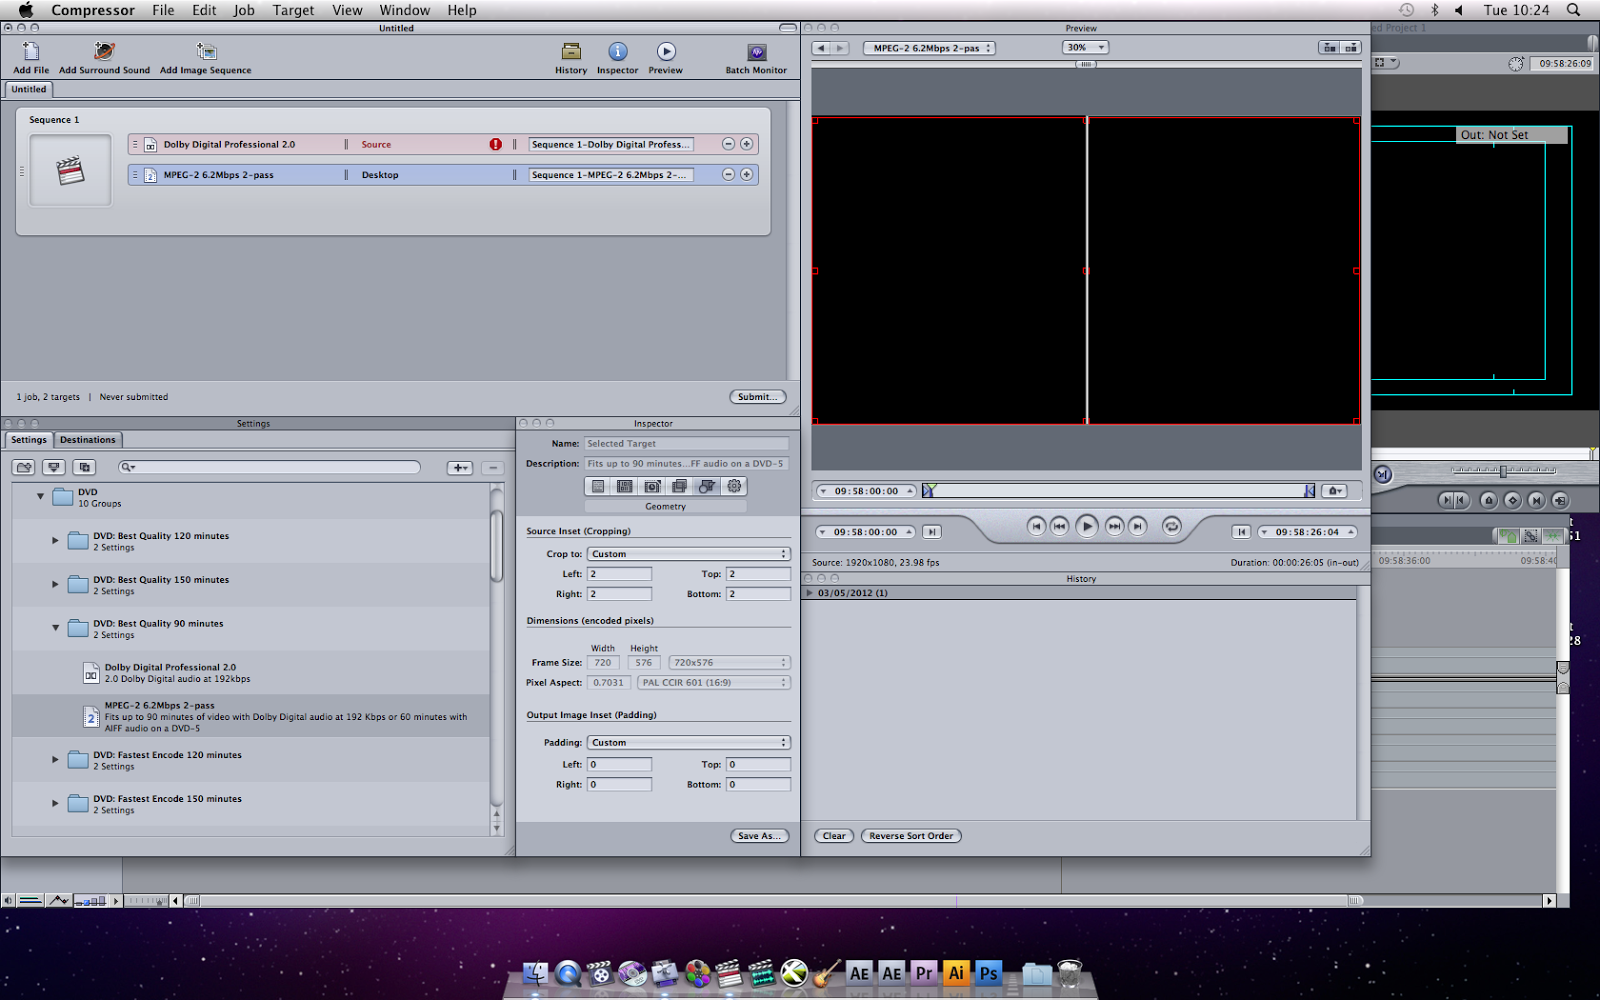
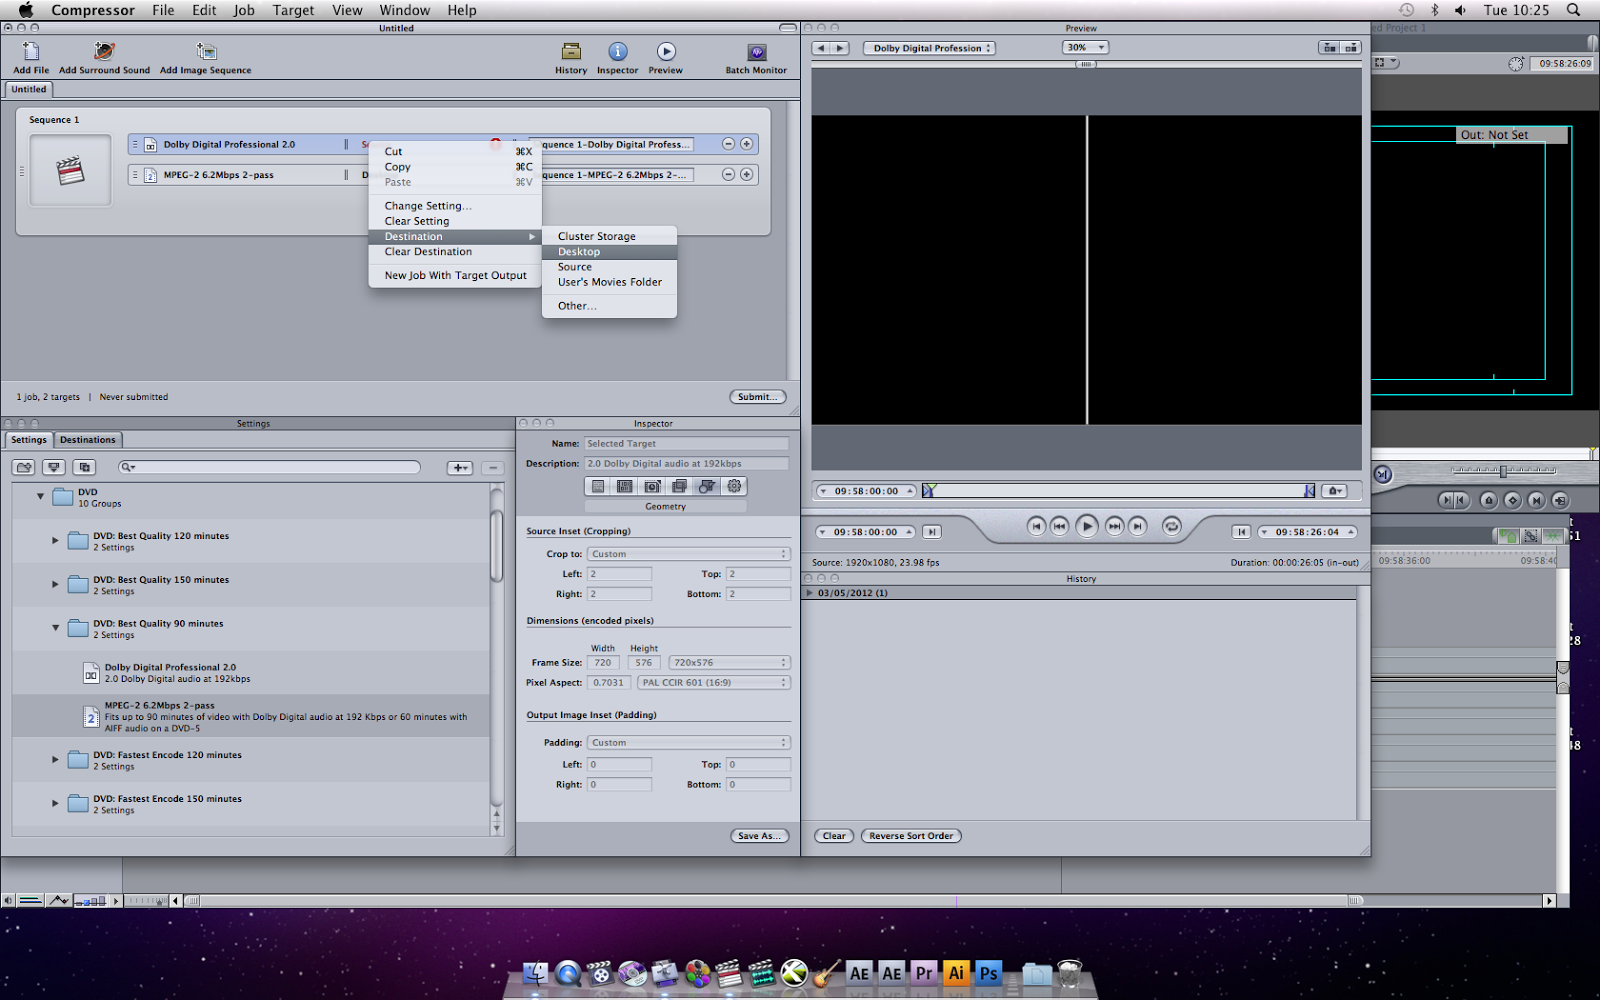
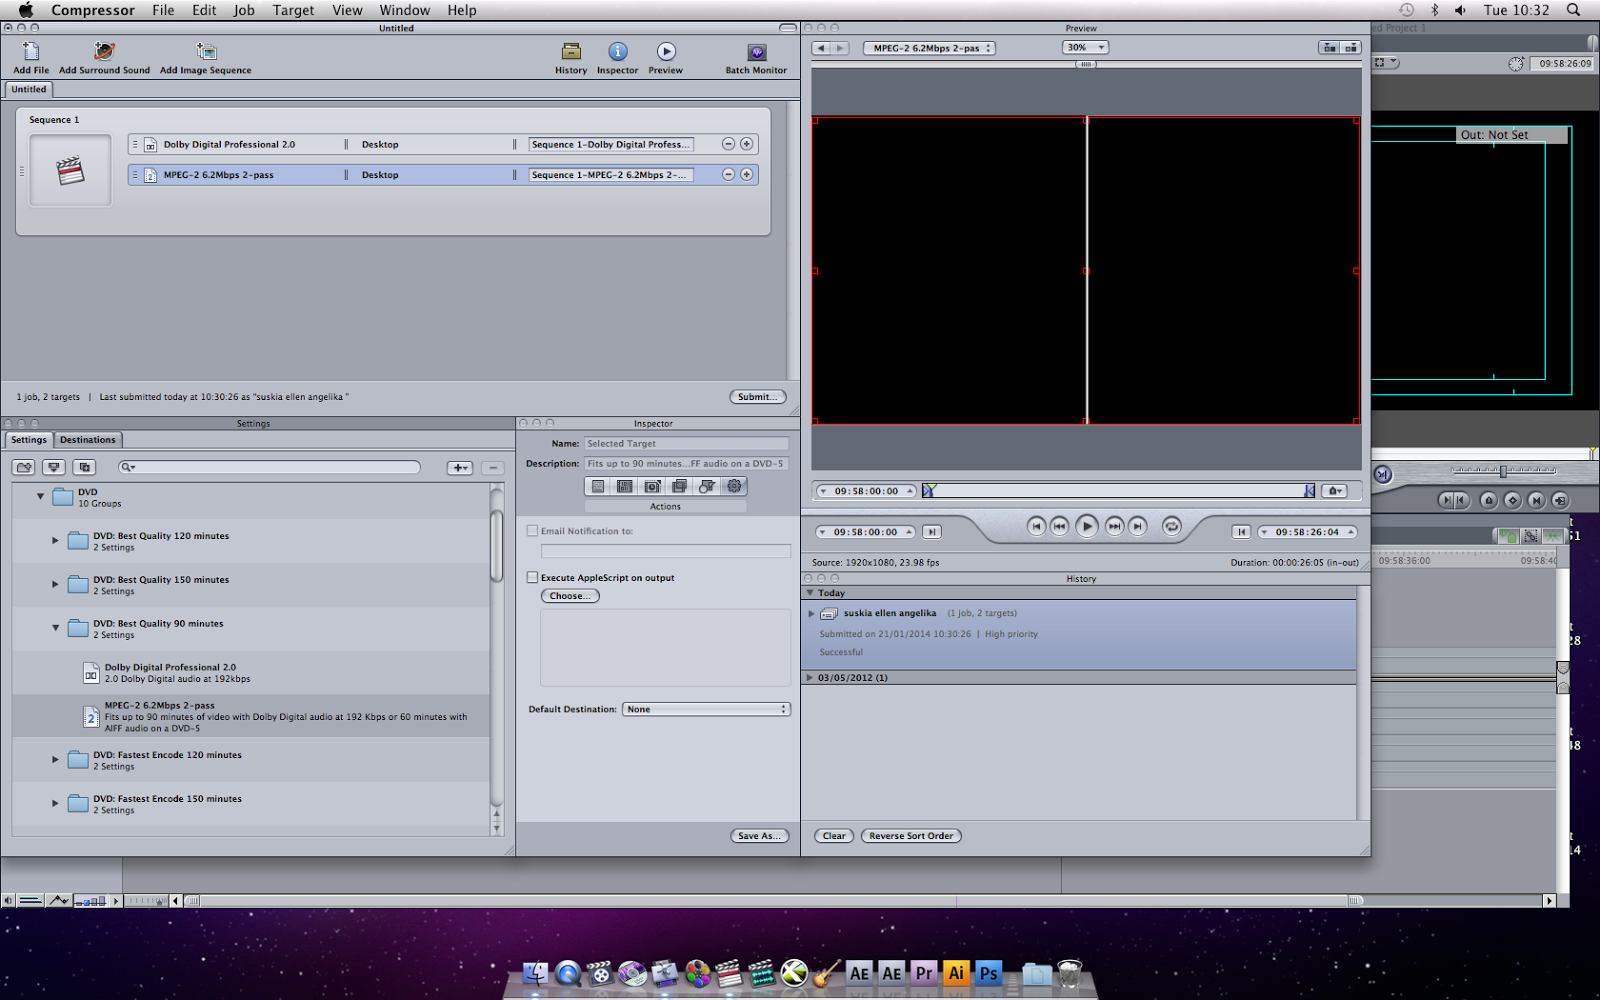
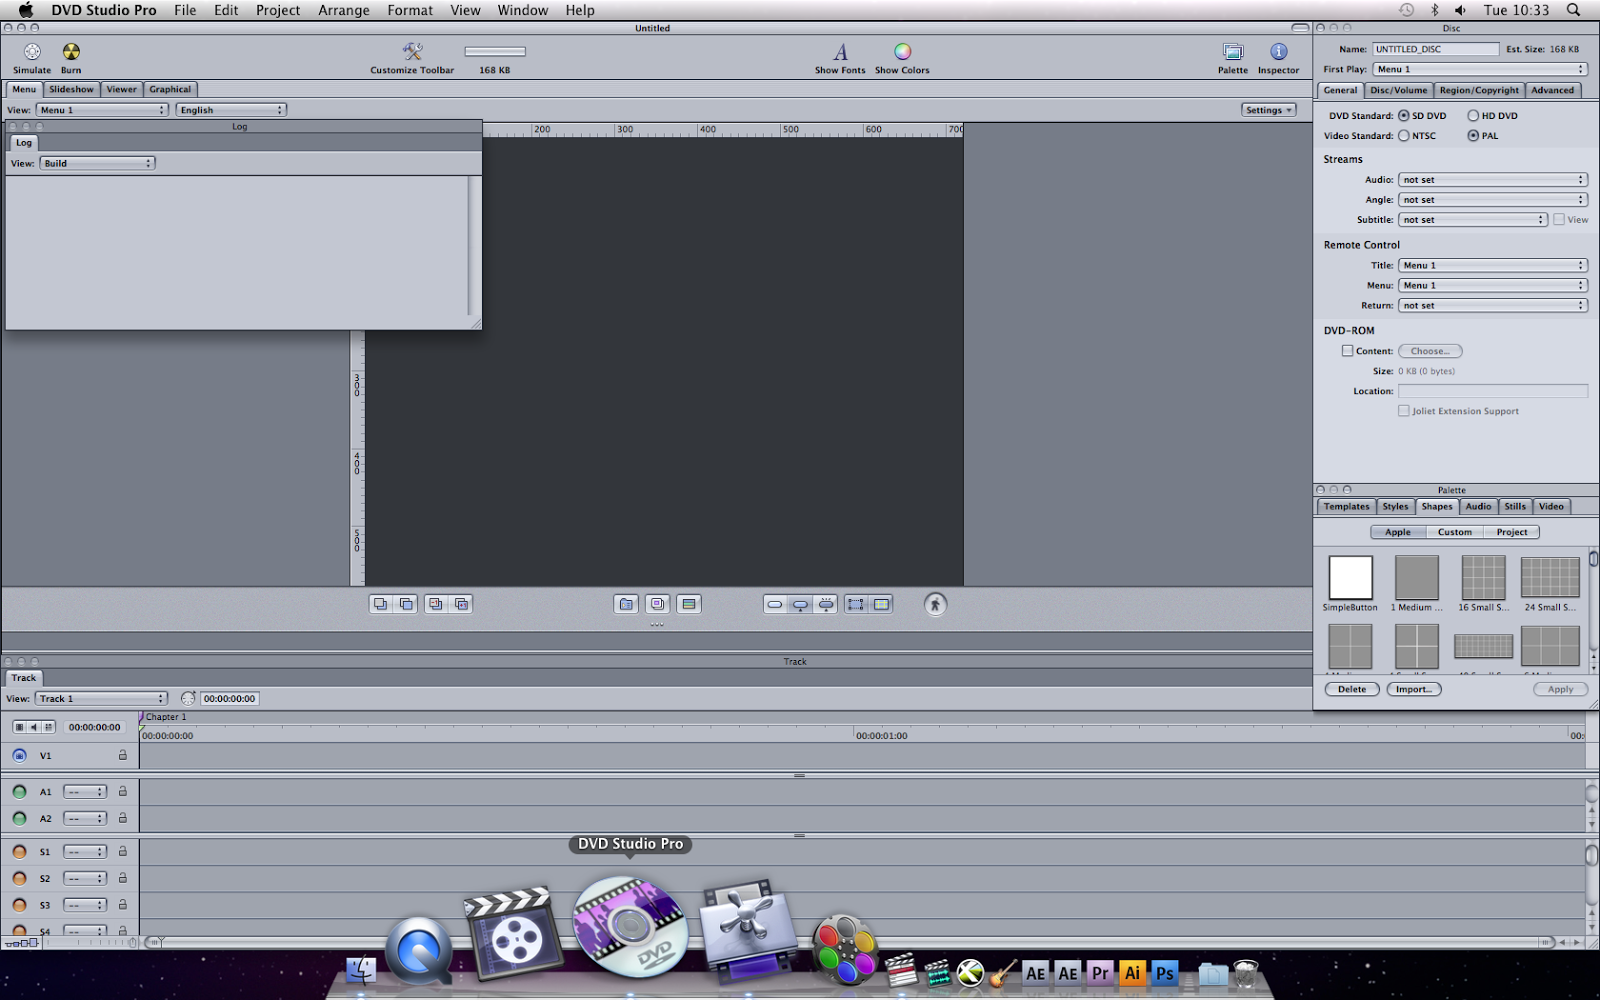
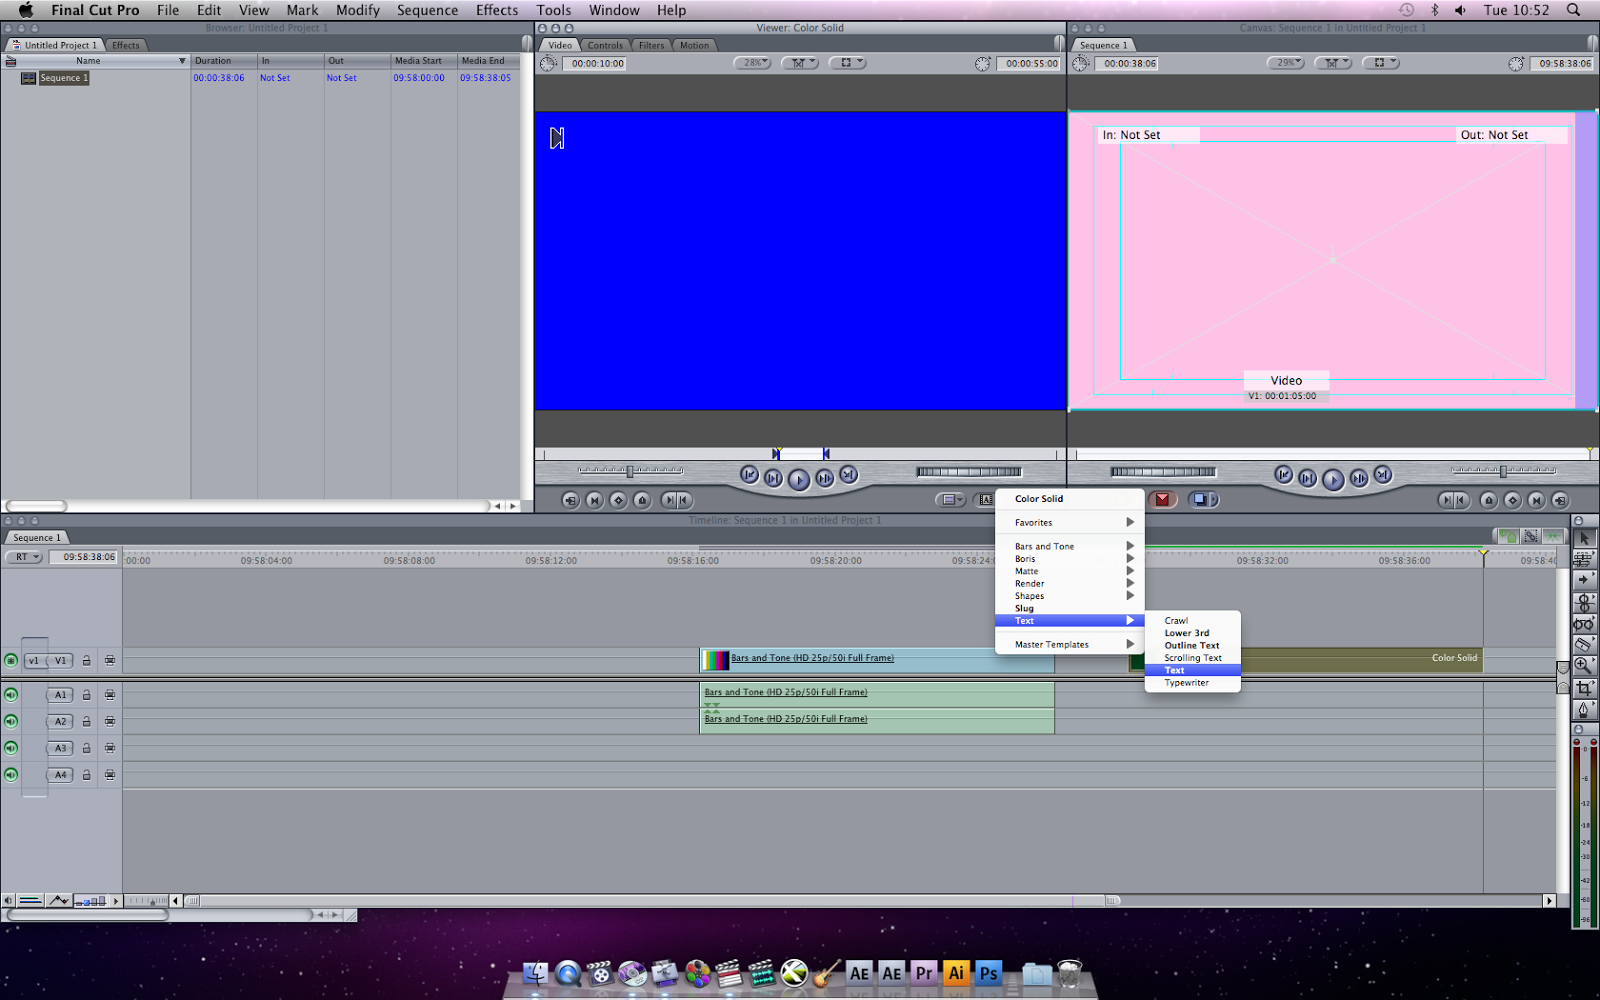
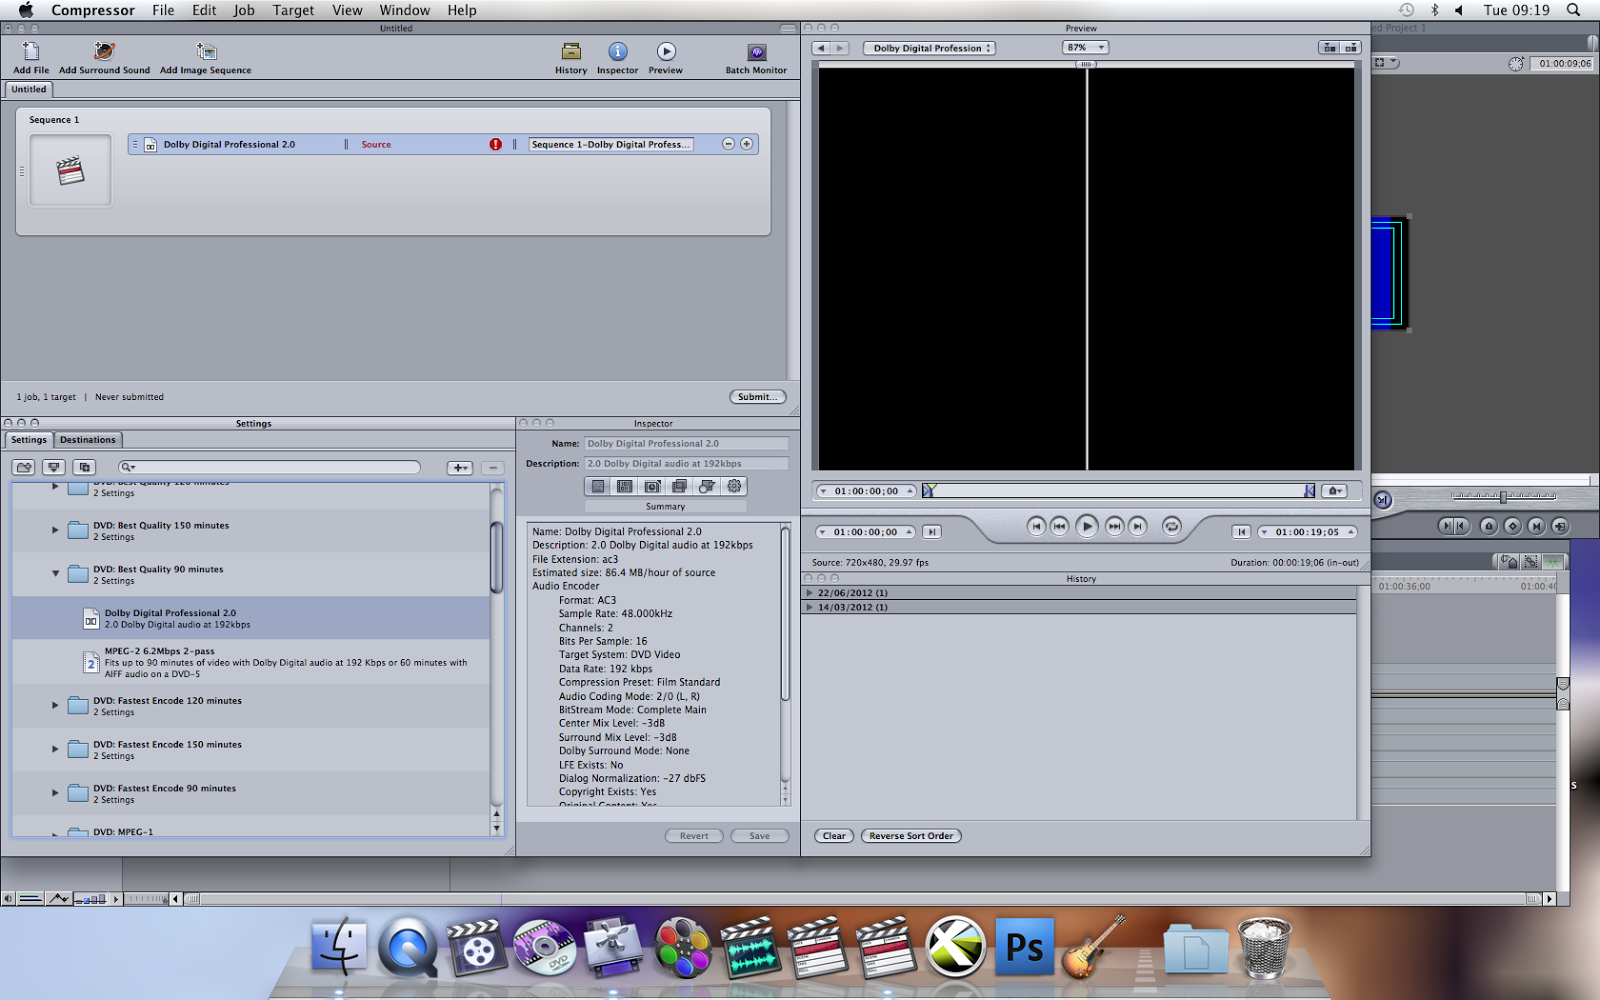
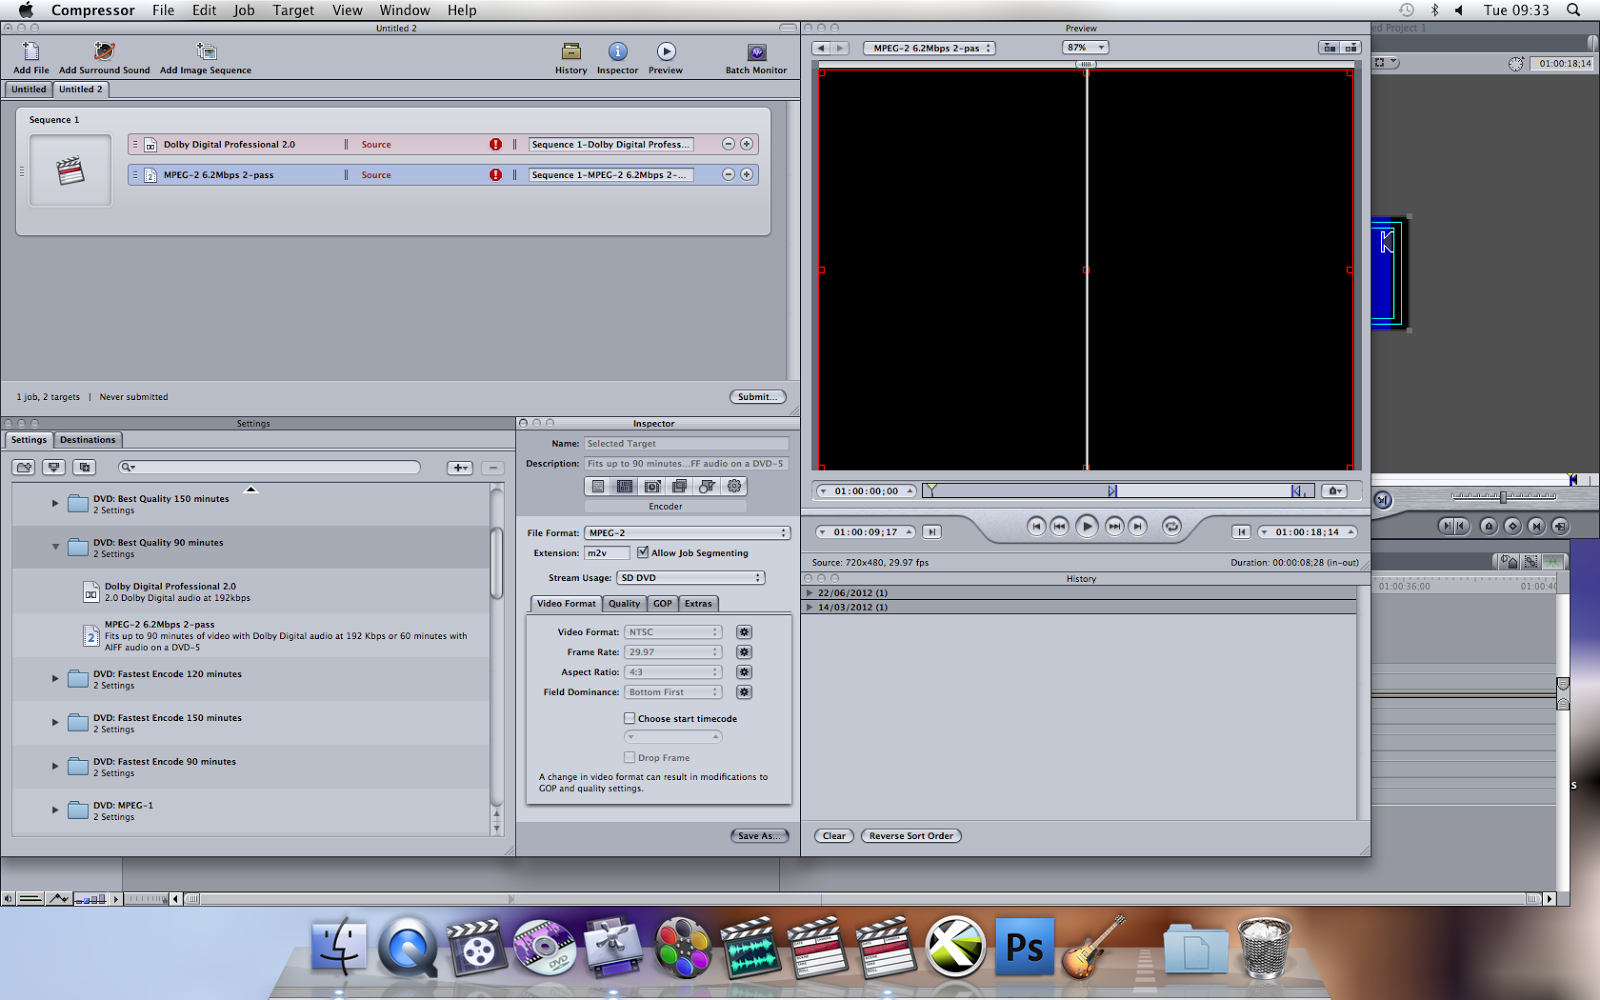
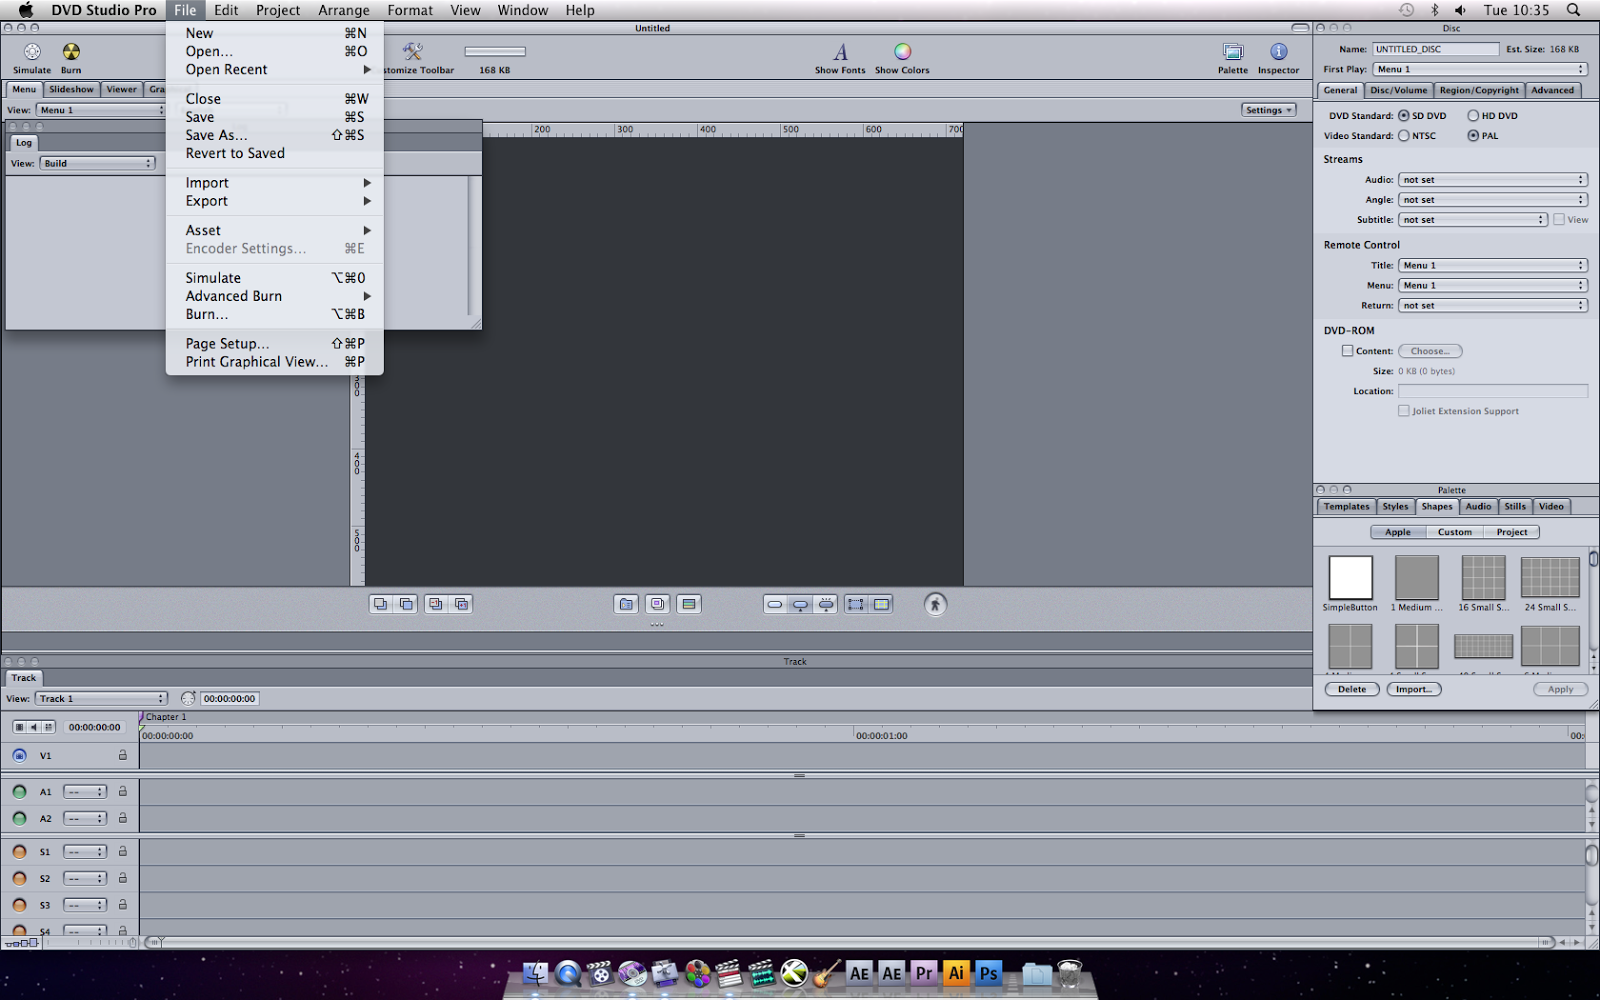
 After we opened DVD Studio Pro, we had to Click on 'File' then 'Import' then 'Asset' then choose files; 'Sequence 1-MPE.bps 2-pass.m2v' 'Sequence 1-Dol Professional 2.0.ac3' then we clicked 'Import'.


Step 9


 We then had to click on 'Graphical' and drag these 2 files up to 'Graphical' Sequence 1.

 Step10
We then had to go to 'File' 'Save as' 'Save'.

Step 11
   
Next step was to go to Final Cut Pro click on 'text' then 'Matte' then 'Color Solid' then 'Controls' then 'Color' and then 'Change the color' then clicked 'OK' and then Drag and drop it to sequence 1.

Step 12
Then we had to change the colour, to do that we had to; click 'Text',then again 'Text' then once again 'Text', then 'Controls','Font Color',then 'Change Color' and then change Alignment to 'left' then press 'OK'.

Step 13
After we clicked 'OK' we then have to drag and drop the text to Sequence 1 just above the 'Color Solid'.

Step 14

Last step was to click 'set input' then 'save as' give the file a name,then 'save & output.


Thursday 16 January 2014

Dvd Studio Pro

Compressor


Step 1

 First of all we opened Final Cut Pro, clicked File, Send to, then clicked Compressor. When the Compressor opened we had to find a file called 'DVD:Best Quality 90 minutes' in Settings, when we found the file we had to click on it and as it expanded we could see two other files called 'Dolby Digital Professional 2.0' and 'MPEG-2 6.2Mbps 2-pass'. We clicked on 'Dolby Digital Professional 2.0' and dragged it up to Sequence 1.


Step 2
After we dragged the file called 'Dolby Digital Professional 2.0 up to Sequence 1,we had to do exactly the same thing with 'MPEG-2 6.2Mbps 2-pass'.

Step 3

After we dragged both files up to Sequence 1 we then had to click on the second file in Sequence 1, and go to Inspector. Inspector allows you to change Video Format, Frame Rate,Aspect Ratio and also Field Dominance. First of all we changed the Video Format.

Step 4
 Next thing we had to do was click on Stream Usage to make sure that the Stream usage is SD DVD.

Step 5
 We then clicked on Video Format as we had to change it from NTSC to PAL. As we changed the Video Format to PAL, we could see Frame Rate automatically change from 29.97 to 25. We also had to change the Field Dominance from Bottom First to Top First.

Step 6
We then clicked Quality in 'Inspector'. Quality option allows you to change the Mode, Average Bit Rate, Maximum bit Rate, and Motion Estimation.


Step 7
We had to choose Mode:Two pass VBR Best,as it is the best and it goes through every field and makes sure the quality is the best when it compresses the file, although the only problem with Two pass VBR Best mode is that it's slow and it takes a long time to compress. After we checked that our Mode is Two pass VBR Best, we had to change the Average Bit Rate from 6.2 to 6.8Mbps we also had to change the Maximum Bit Rate from 7.7 to 8.0Mbps. Motion estimation had to be: Best.


Introduction

Introduction


On my blog I am going to;

  ...research DVD's...
*Layers
*History
*Copyright
*Interactive menus
*Regions
*Different sizes

...include screenshots of my progress creating a DVD for the Thornham project...

...include photographs...


...include screenshots of my work...